|
Tennis Video Can Validate Your Tennis TechniqueUsing tennis video can take your game to the next level. Dartfish and other video analysis softwares and apps are used for many major sports including tennis, golf, gymnastics, baseball, softball, skiing, swimming, weight lifting, badminton, and volleyball. Every serious competitor wants this teaching aid to help perfect the most efficient form in whatever sport it’s used.
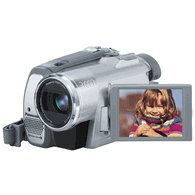
The first step is to get a video camera and tripod. I purchased the Panasonic PV-GS180 Digital Video Camcorder in 2006 for around $440. (You can do much better now!) It was a reliable camera (except when one of my students hit the camera with a ball square on the lens!). The camera used a DVC tape, so I always carried extra tapes. Also, I made sure to carry a fully charged back-up battery, in case the main battery ran down. I used a DV import cable that attached to the camera and to the computer. The “DV Import” button in Dartfish is where you bring your tennis video into the software. You'd set your “Capture Location” to where you want the video clips to go. I like to put my clips on an external hard drive to keep my laptop free of hard drive space. The red button below the video is how to begin to import your video.
You can name your file before importing it or rename it after. The Dartfish “Library” helps you organize the video clips. The more organized the clips are, the more you will get out of your program. You can sort by camera angle, sport, gender, etc. Each of these categories allows you to sort through your videos and find just what you’re looking for. The “Player” section is where you trim your clips. All of your originals will show up so you can select and play them. When you find the location to start the clip edit, right click on the green curser and select “set in.” Then let the video roll until it gets to your desired end. Use the frame arrow at the bottom to fine tune your stopping point. Right click and select “set out.” When everything looks good, then go to “save movie.” The “Analyzer” button is where you’ll bring in your “professional” clip and place your clip next to it. There are a lot of features that you will use to get the picture you want. The main ones I used were the “split-screen mode” and the “move tool.” You’ll also use “flip horizontal” for left handed players. You’ll sync up the ball at the contact point players. At the end, save your video as a “Mediabook.” Coaches can email the video to their students. To open, go to Dartfish and download the free DartViewer. The strokes are located in the drop down box next to “Analysis Selection.” You can play the video and read any comments by clicking on the “Key Positions.” You can click on “B” if you want to look at your video separately. You can see this in “Analysis View” and “SlideShow View.” I hope these instructions on tennis video help you to use the Dartfish video analysis software. There is obviously much more to learn about this software, so I would encourage you to go through training with Dartfish—that’s what I did. Their support was helpful as I was on the learning curve. Now I'm actually taking what I learned from Dartfish and applying it to easier a less expensive video analysis software (for my mac...Dartfish operates on PC only) and app on my smart phone. Learning Dartfish and a newer more simple video analysis software and app has been worth the effort for me. I think whatever software and/or app you decide to use will help your game and coaching as well. |


